address
Reach Us
Shivai Nagar, Pokhran Rd. no 1, Thane-400606, Maharashtra, India.
email
Email

Safety Valve Calibration

Safety Valve Calibration
A pressure safety valve (PSV) or safety valve is a pressure relief valve:
  • ➣ Used mainly on a gas-filled tank ( cryogenics like liquid oxygen, argon, nitrogen)
  • ➣ That opens rapidly (pop action) and fully when reached the set pressure is reached.
  • ➣ Where released gas is vented or discharged in the atmosphere or open air
A relief valve is a pressure relief valve (PRV):
  • ➣ Used in a liquid filled tank
  • ➣ That will open gradually or in a proportion with the increasing pressure
  • ➣ Where the released liquid is discharged back to the system

Why Do We Need to Calibrate a PSV?

Below are some of the reasons why we need to perform calibration and testing of PSV regularly:


Safety Valve Calibration
Pressure Safety Valve Calibration Setup

The calibration setup is the same with the pressure gauge, the only difference is that PSV has no display to be seen.
There are 2 setups you can implement.

  • ➣ 1. By using a pneumatic pump as the pressure source. Connect the module and the valve as shown in the photo.
    Calibration Setup using a pneumatic pump.
  • ➣ 2. By using nitrogen gas or compressed air as the pressure source. You can watch the below video for a simple demonstration.

PSV calibration is done by comparing the set pressure, which is the rapid releasing action (popping) of the PSV, to the displayed value of the reference standard. The pressure relief valve testing procedure to verify the accuracy of output pressure (set pressure) is the same.

Calibration Procedure:
  • ➣ Determine the set point of the pressure gauge. Be aware of this set point to anticipate the opening of the valve while controlling the pressure source.
  • ➣ After performing the set up above, ensure that there is no leak.
  • ➣ Increase the pressure until a sudden release or pop action is observed.
  • ➣ Check the displayed pressure reading in the standard and record in your Measurement Data Sheet (MDS).
  • ➣ Slowly decrease the flow of the pressure then observe the closing of the valve, this is the reseating pressure value- record it.
  • ➣ Repeat procedure 2 – 3 up to 3 times.
  • ➣ Do not forget to label and seal to prevent unauthorized adjustment.
The 3 stages to observe during Safety Valve Calibration:
  • Set Pressure – this is the pressure reading when the valve will pop or release a pressure rapidly. Tolerance is usually 3% of the set pressure.
  • Overpressure – This is pressure above-set pressure where the valve will open fully. It has a tolerance of up to 10% above the set pressure.
  • Closing pressure – this is known as the reseating pressure. It is the pressure reading when the valve will fully close and stop releasing.

This can be best understood under the term blowdown pressure which is the difference between the set pressure and reseating pressure.

Because of the rapid popping action during the discharge, it is hard to notice the difference of set pressure and overpressure. Without the tolerance specified, set pressure and overpressure reading are the same, mostly for results higher than set pressure.

We are using a 10% tolerance or the tolerance specified by the manufacturer or as per the requirement of the user as the basis for a pass or failed verification.

How to Adjust a Pressure Safety Valve?

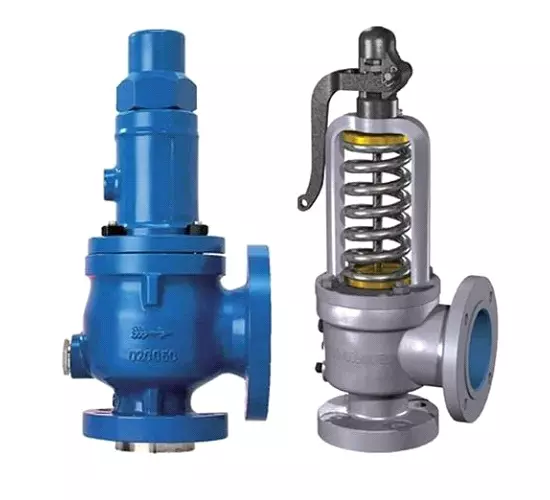
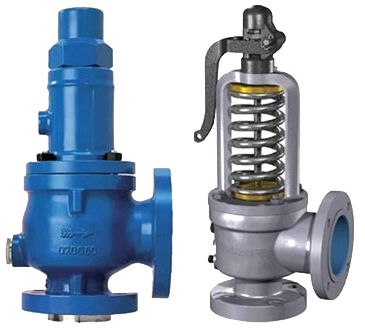
Since a PSV is purely mechanical. It can be repaired or adjusted. The adjustment is simple, you just need the right tool.

PSV has a set pressured that is determined by the strength of the spring inside it. The more the spring it is compressed, the stronger or higher the pressure it can withstand or create.

In order to adjust the set pressure, we need to change the compression and/or the elongation of the spring by rotating the adjusting screw located just above the spring.

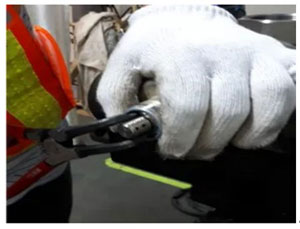
3 Steps to perform Adjustments:

  • ➣ Removing the bonnet cover, a ring with a screw will be exposed.
  • ➣ Loosen the ring-like lock screw to access the adjusting screw.
  • ➣ Once the lock is loosened, turn the adjusting screw ( clockwise or counter-clockwise) to adjust at the desired range. See photo below.

Simply rotate the screw until the desired range is achieved. But be careful not to over rotate, you may damage the spring.


Safety valve testing